[C#]如何寫一個有定時器與記錄功能的Windows服務
這次來分享是如何寫Service,在一些場合,常常看到有不少事情是使用console去執行的,但是用Console有個缺點就是若沒有特別去防護,那遇到重複開啟或是不小心關掉的時候,就會很麻煩,以前工作上就一直想把公司用的console程式都改成Service的方式運作,但是一直沒有時間,只好作罷。
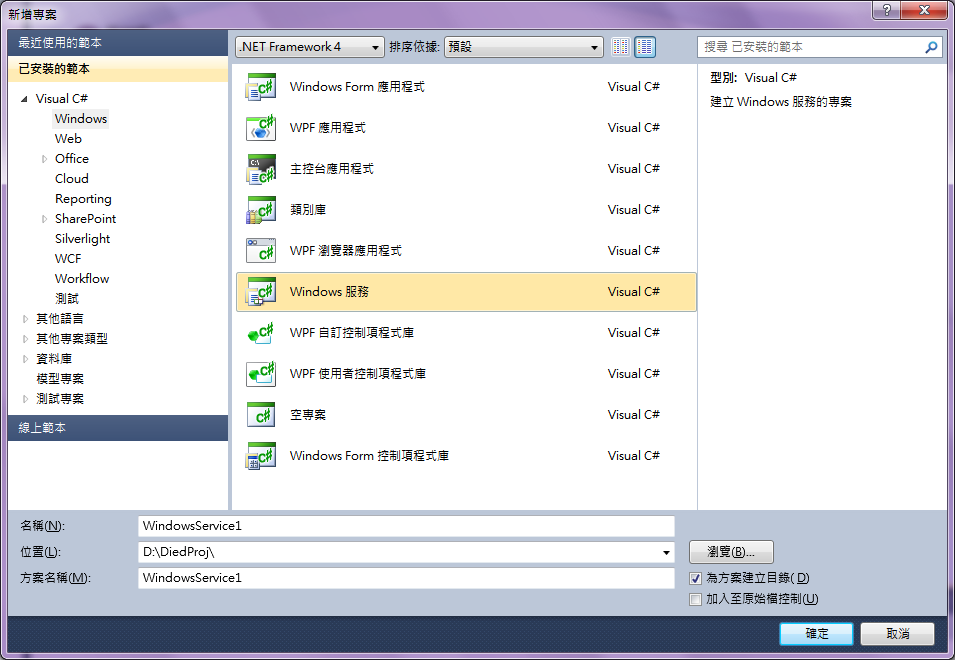
離題了,直接來進入主題,要寫一個新的Service,先用Visual Studio新增一個 Windows 服務的專案。
接下來就是code的部分了。
using System;
using System.Diagnostics;
using System.ServiceProcess;
using System.Timers;

namespace WebWatcher
{
    public partial class WatchService : ServiceBase
    {
        private static readonly Timer Timer1 = new Timer();

        public WatchService()
        {
            InitializeComponent();
        }

        protected override  void OnStart(string[] args)
        {
            //EventLog.WriteEntry Method (source, message, EventLogEntryType, eventID)
            //source name better same as Namespace
            EventLog.WriteEntry("WebWatcher", "Service Start", EventLogEntryType.Information, 201);
            Timer1.Elapsed += new ElapsedEventHandler(Timer1Elapsed);
            Timer1.Interval = 10000;
            Timer1.Enabled = true;
            Timer1.Start();
        }

        protected override void OnStop()
        {
            EventLog.WriteEntry("WebWatcher", "Service Stop", EventLogEntryType.Information, 202);
            Timer1.Enabled = false;
        }

        private static void Timer1Elapsed(object sender, EventArgs e)
        {
            //write code here
            EventLog.WriteEntry("WebWatcher", "Start Watch", EventLogEntryType.Information, 200);
        }
    }
}
Service內的兩個function OnStart()與OnStop()分別對應了這個服務的啟動與停止,所以我把Timer設定在這邊,Timer的間隔為10000毫秒,也就是每10秒會去啟動TimerElapsed()這個function,而要做的事情就寫在這裡面了。
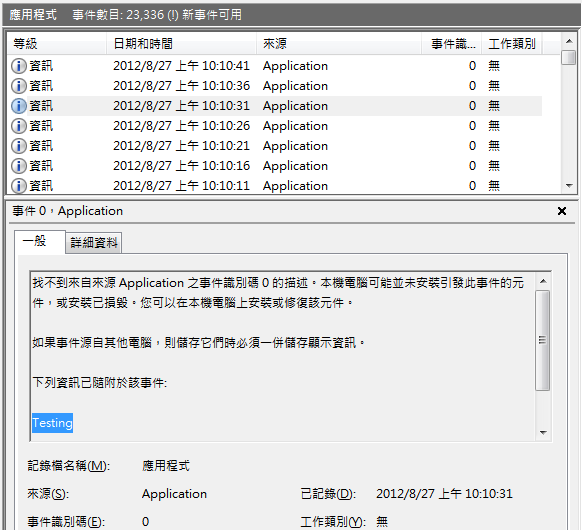
寫入Windows EventLog的方法,我是用EventLog.WriteEntry Method,這邊記得Source要寫你的Namespace名稱,因為在安裝Service的時候預設會用這名字註冊進去,若亂打會在EventLog裡看起來很醜,像是這樣。
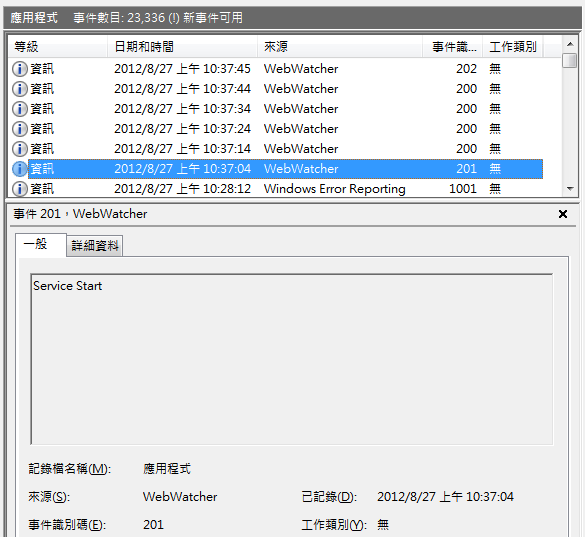
EventLog有寫好的話應該是這樣,比較好看一點。
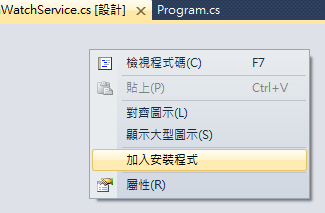
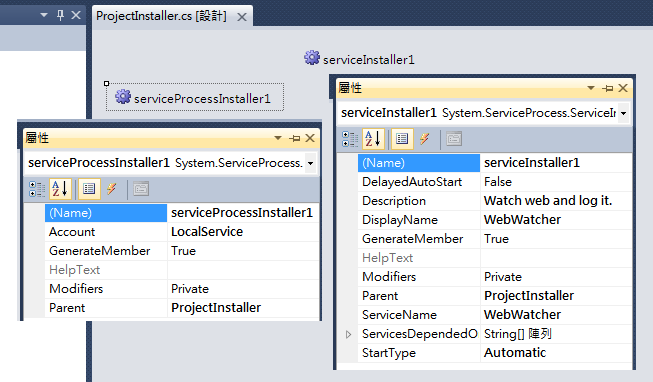
服務的程式部分寫好後,就要來弄安裝的部分,這邊我不曉得怎麼在code裡面設定,所以就用滑鼠點XD,基本就是在你的server設計上右鍵選擇[加入安裝程式(Add Installer)]。
然後就會長出來一個叫ProjectInstaller.cs的東西,裡面已經有兩個元件叫serviceProcessInstaller與erviceInstaller,分別設定好(請見圖參考)之後,就可以建置這個專案了。
建置完成後,就要將這個service安裝到windows內,方式很簡單,Windows Service專案建置出來會是一個.exe檔,只要用.Net Framework的 installutil 工具去指這個exe檔就可以了, installutil.exe 的位置在 %windir%\Microsoft.NET\Framework\[version] 裡面,移除的話也很簡單,加上-u指令就好。
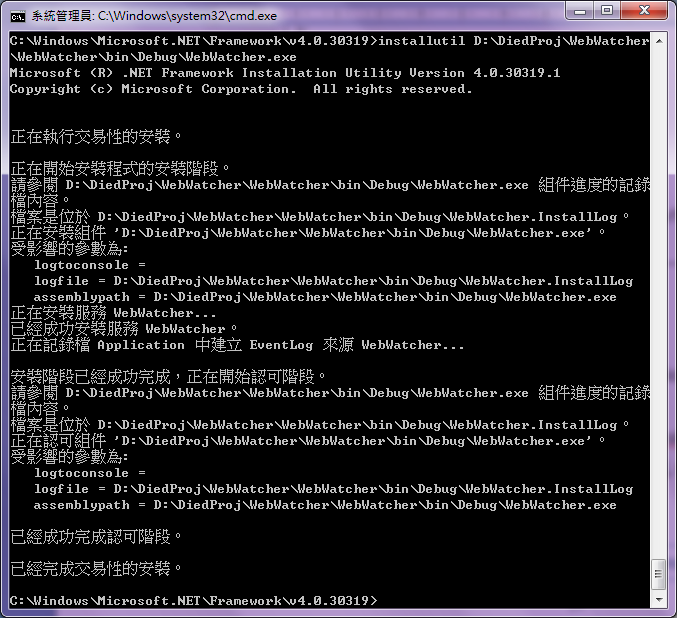
最後,請記得安裝與移除服務時,要把檢視服務的視窗關掉,不然會失敗的。

No comments:
Post a Comment